
Suspected contamination in a peptide vial means microbial growth, endotoxin, or particulate matter may compromise sterility, and the vial must be quarantined immediately rather than used. Seal it, label it with date and lot number, photograph the contents, notify your quality assurance contact, and arrange sterility or endotoxin testing before any decision on disposal. Most contamination is preventable through disciplined reconstitution, aliquoting, and supplier verification.
What causes peptide vial contamination?
Contamination reaches a vial through two distinct pathways, and distinguishing between them determines where corrective action belongs. Intrinsic contamination originates during manufacturing, before the vial ever reaches your bench. Extrinsic contamination happens afterward, introduced by handling, storage, or the local laboratory environment.
Intrinsic sources trace back to synthesis and packaging. Peer-reviewed analysis of commercial synthetic peptides has found that impurities introduced during synthesis or by inadequate handling can affect biological assays and, in some cases, safety outcomes. These impurities are not always visible and are not always microbial. They can include residual solvents, truncated sequences, or trace endotoxin carried over from raw materials, and a compromised container closure at the point of lyophilisation can seal in contamination before a single glove has touched the vial.
Extrinsic sources are the ones a laboratory actually controls day to day:
- Personnel practice — inconsistent glove changes, ungloved contact with stopper surfaces, or talking directly over an open vial introduces skin flora and respiratory droplets.
- Environmental breaches — working outside a biosafety cabinet or laminar flow hood when reconstituting, or a poorly maintained cleanroom with lapsed HEPA filtration checks.
- Container and component failures — stopper coring from repeated needle punctures, residual detergent or particulate in glassware, or a compromised crimp seal that lets air (and whatever is in it) enter the vial.
- Solvent and diluent risks — using non-sterile water, expired bacteriostatic water, or a diluent stored at the wrong temperature after its own seal was broken.
- Supply chain gaps — peptide sourced without a verifiable certificate of analysis, or a batch with no traceable synthesis documentation.
Coring deserves particular attention because it is invisible until you look for it. Each needle insertion through a rubber stopper can shear a small fragment of rubber into the solution, and beyond the particulate risk, a cored stopper compromises the seal integrity that keeps the vial sterile between uses. Labs that puncture the same vial dozens of times over its working life are running a cumulative risk that has nothing to do with the peptide itself.
Supplier-side contamination control matters more than most labs assume. A contamination control strategy that integrates facility design, environmental monitoring, and process controls is what separates a supplier who occasionally ships a bad lot from one who almost never does. When you're evaluating a new peptide source, the presence or absence of a documented CCS is often the clearest signal available.
How do you spot a contaminated peptide vial?
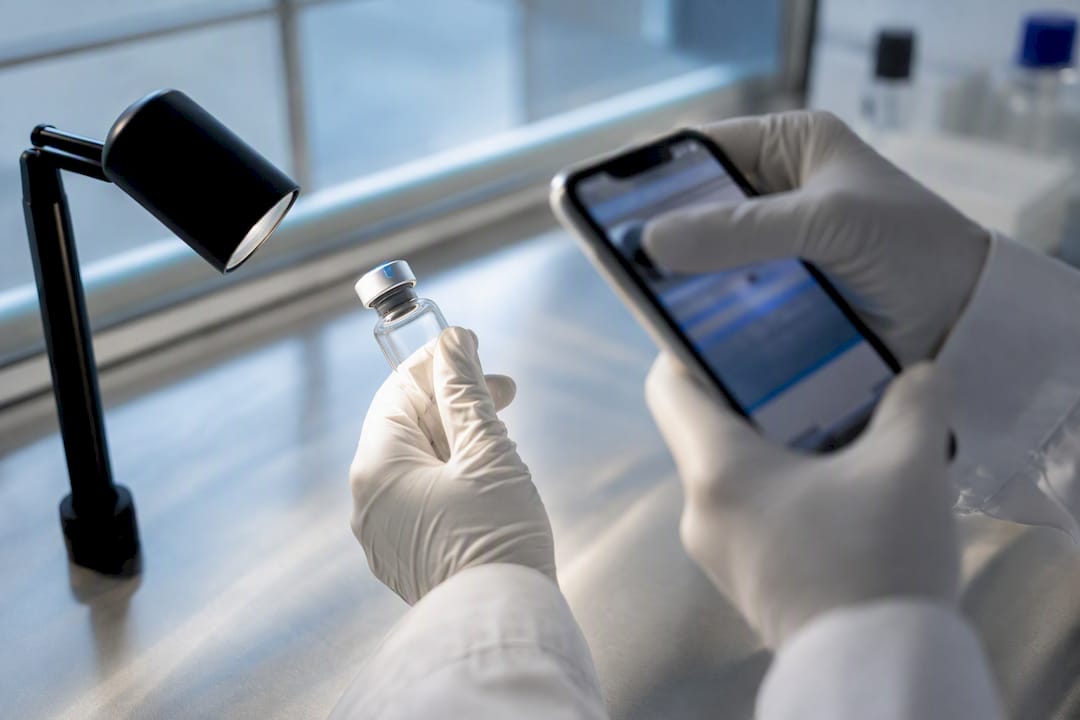
Visual and olfactory triage won't confirm contamination on its own, but it tells you fast whether a vial needs testing or immediate discard. Run through this sequence whenever a vial looks, smells, or behaves differently to what you expect.
- Inspect before opening. Check the seal for cracks, the stopper for visible coring, and the solution for colour change against a known-good reference vial.
- Warm and swirl. If the peptide was refrigerated or frozen, let it reach room temperature, then gently swirl (never shake) to see whether cloudiness clears.
- Read the clearing pattern. Cloudiness that fully clears on warming is often aggregation or precipitation rather than contamination. Persistent haze, visible particles, or a colour shift after warming points toward microbial contamination and should be treated as a discard case.
- Smell cautiously, from a distance. A sour, yeasty, or otherwise unexpected odour is a red flag, though its absence does not rule out contamination.
- Check the surface for film. A film or ring at the liquid's surface, especially one that wasn't there on the previous use, suggests microbial growth rather than a reconstitution artefact.
The limitation here is fundamental: your eyes and nose can catch gross contamination, but they cannot detect low-level bioburden, endotoxin, or early-stage microbial growth below a visible threshold. A vial that looks perfectly clear can still fail a sterility test. Treat visual triage as a fast filter for obvious problems, not a clearance mechanism. If a vial passes visual inspection but you have any reason to suspect a breach (an unusual number of punctures, a diluent that sat outside cold storage, a reconstitution done outside a biosafety cabinet), escalate to testing anyway.
Pro Tip: Photograph every vial you inspect, including the ones that pass, and log the puncture count on the label each time you draw from it. When something does go wrong three weeks later, a photo timeline and an accurate puncture log are often the only way to reconstruct what happened and rule out (or confirm) a handling error.
Which lab tests confirm contamination in a peptide vial?
Visual triage tells you a vial is suspicious. Laboratory testing tells you whether it's actually contaminated, and which category of contaminant you're dealing with. Three test types cover almost every scenario a research lab will encounter.
Compendial sterility testing is the gold standard for confirming or ruling out microbial contamination. The sample is introduced into a growth medium (or passed through a membrane filtration system into one) and incubated, typically for 14 days, with periodic checks for turbidity or visible colony growth. A positive result at any point during incubation is treated as contamination, full stop, no matter how clear the vial looked on day one. Media fill testing, which simulates the aseptic filling process using growth medium instead of product, is the parallel method suppliers and labs use to validate that a process itself is not introducing contamination. Robust media fill design and sterility assurance programs are considered essential validation tools across sterile manufacturing, not just a regulatory checkbox.
Endotoxin testing (LAL assay) matters when the concern is bacterial toxin rather than live organisms. Gram-negative bacteria shed endotoxin even after they're dead, so a vial can test negative for viable microorganisms and still carry a dangerous endotoxin load if it was contaminated and then, say, autoclaved or otherwise sterilised without removing the toxin. The Limulus Amoebocyte Lysate assay is the standard method, and it's the test to reach for whenever you suspect contamination occurred earlier in the supply chain rather than at your own bench, since endotoxin persists long after the organisms that produced it are gone.
Rapid microbiological methods (RMMs), including ATP bioluminescence assays, offer same-day or next-day screening rather than the multi-day wait of compendial sterility testing. They're valuable for environmental monitoring and for triaging multiple suspect vials quickly, but they screen for bioburden rather than confirming sterility to the same standard. Rapid methods reduce turnaround for decision-making without replacing the full sterility program when a definitive answer is required.
Choosing between these comes down to what decision you're trying to make:
- Use sterility testing when a vial will be used in a critical experiment, a clinical-adjacent application, or when the outcome needs to withstand scrutiny.
- Use endotoxin/LAL testing when the suspected contamination point was upstream (supplier, raw material) rather than at your bench.
- Use rapid methods for routine environmental monitoring, or as a fast first-pass screen before committing to the full incubation window.
If you're sending a sample to an accredited external lab, provide the full history: lot number, date received, storage conditions since receipt, number of punctures, and any deviation from your standard reconstitution procedure. A lab working blind can only test for contamination in general; a lab working with your puncture log and storage history can target the test toward what's actually likely to have gone wrong.
Best practices for peptide vials from receipt to reconstitution
Contamination prevention is a chain, and it only takes one weak link (a dirty bench, an expired diluent, a vial refrozen after thawing) to undo everything upstream of it. Building the chain properly starts the moment a shipment arrives.
On receipt, inspect every vial before it goes into storage. Check the certificate of analysis against the physical shipment, confirm lot numbers match the paperwork, and log each lot into a traceability record before it's touched again. Any vial with a damaged seal, an unreadable label, or a COA that doesn't match should go straight into quarantine rather than the fridge. This is also the point at which verifying peptide quality standards on receipt pays off, because catching a documentation gap here is far cheaper than discovering it mid-experiment.
Before opening a chilled or frozen vial, let it equilibrate to room temperature for roughly 20 to 30 minutes. Opening a cold vial too quickly causes condensation on the interior surfaces, and that moisture can drive hydrolytic degradation and introduce a route for contaminants once the seal is broken. Document the equilibration time in your log alongside the puncture count.
Reconstitution technique is where most preventable contamination actually happens:
- Swab the stopper with an alcohol wipe and let it air dry before inserting a needle.
- Use a fresh, sterile needle and syringe for each reconstitution, never reusing a needle that's touched another surface.
- Mix by gentle swirling rather than shaking, since shaking introduces shear stress that can denature the peptide independently of any contamination concern.
- Choose your diluent deliberately. Bacteriostatic water contains benzyl alcohol as a preservative, which extends the working life of a multi-use vial, while sterile water has no such protection and is better suited to single-use preparations.
Aliquoting and freezing rules are where a lot of otherwise careful labs still lose peptide to avoidable damage. Reconstituted peptide is fragile, and long-term stability depends heavily on temperature and container material, with lyophilised peptide generally best kept at minus 20 degrees Celsius. Freezing a reconstituted vial in its original multi-use container is discouraged, because preservative distribution becomes uneven and ice crystal formation damages the peptide structure unevenly across the vial. Aliquot into sterile, single-use volumes immediately after reconstitution, then freeze the aliquots you won't use within days. Never refreeze a thawed aliquot. Repeated freeze-thaw cycles degrade peptide integrity and, separately, each thaw cycle is another opportunity for contamination to take hold if the aliquot wasn't handled aseptically on the way back out.
The commonly cited 28 to 30 day discard window for a reconstituted vial isn't really about the peptide's own chemical stability. It's governed by the preservative limits of the bacteriostatic water diluent, meaning the sterility clock is largely set by the benzyl alcohol's effective window rather than the peptide sequence itself. Practically, that means opening a fresh vial of diluent for any critical reconstitution rather than relying on one that's been open for three weeks, even if it's technically still within the 30-day window.
Minimise punctures. Every needle insertion is a contamination opportunity and a stopper-coring risk. Label each vial with the date of first puncture and keep a running tally on the label itself, not just in a separate log, so anyone drawing from it can see at a glance how many times it's been accessed. Work inside a biosafety cabinet or, at minimum, a still-air workstation, and maintain strict glove discipline: change gloves between vials, never touch a stopper surface with a bare or previously contaminated glove, and don't reach across an open vial.
At the program level, environmental monitoring and periodic media fills aren't just a manufacturer's concern. A lab running frequent reconstitutions benefits from its own lightweight contamination control strategy, even an informal one: periodic swabs of the biosafety cabinet, a documented glove-change protocol, and a habit of reviewing puncture logs when something goes wrong.
Pro Tip: Keep a dedicated, fresh vial of bacteriostatic or sterile water reserved solely for high-value reconstitutions, and don't let it double as the lab's general-purpose diluent. A diluent vial that's been punctured twenty times for routine work is a much higher contamination risk than one you've opened three times for critical experiments.
What to check on a supplier's documentation before you trust a vial
Not every contamination risk originates at your bench. Some arrive in the box, and the only defence is scrutinising the paperwork before the peptide goes anywhere near a reconstitution station.
- Confirm the certificate of analysis covers the fields that matter. A usable COA states a sterility statement or bioburden result, endotoxin level, purity percentage (ideally with the method used to measure it, since purity and net peptide content aren't the same figure), synthesis notes, and an expiry date. A COA missing any of these is a documentation gap, not a formality.
- Ask for evidence beyond the COA when the material is sterility-sensitive. Media fill data, a description of the supplier's contamination control strategy, and third-party testing results (rather than solely in-house results) all indicate a supplier who has actually built sterility assurance into their process rather than bolted it on afterward.
- Verify lot traceability before you log the shipment into inventory. Every vial should trace back to a specific synthesis batch, and batch traceability documentation should let you connect a specific vial in your freezer to a specific production run months later if a problem surfaces.
If a shipment fails any of these checks, document the nonconformance in writing: what's missing or inconsistent, the lot number affected, and the date discovered. A single missing endotoxin figure might warrant a request for supplementary documentation. A pattern of gaps across multiple lots from the same supplier warrants escalation toward a formal corrective and preventive action (CAPA) process, and in serious cases, a supplier recall request. Keep this documentation even when the immediate issue resolves, because a CAPA history is what protects a lab if a contamination event traces back to a supplier months after the fact.
What to do the moment you suspect a contaminated vial
Speed and discipline matter more than instinct here. Follow the sequence rather than improvising.
- Quarantine immediately. Physically separate the vial from active stock, seal it, and label it with the date and reason for quarantine. Photograph the vial and the label together for the record.
- Log the history. Record puncture count, storage conditions since receipt, and any deviation from standard handling before memory of the details fades.
- Choose your test. Decide between a rapid screening method and full sterility or endotoxin testing based on how the vial will be used and how urgently you need an answer. A vial destined for a critical experiment warrants full testing regardless of turnaround time.
- Notify and record. Alert your QA contact or supervisor, log the incident in your contamination register, and note the outcome once testing is complete.
- Dispose safely if confirmed. A vial confirmed contaminated should be discarded according to your lab's biological waste protocol, never returned to general stock regardless of how much unused peptide remains.
- Open a CAPA if the pattern warrants it. A single isolated vial might close with disposal and a note. Repeated contamination from the same batch, storage condition, or handling step should trigger a formal corrective action review.
When sterility genuinely can't be confirmed and the material was destined for anything beyond a low-stakes screening assay, discard rather than gamble. No bench technique reliably restores sterility once it's been compromised, and the cost of a replacement vial is small next to the cost of a contaminated dataset or an endotoxin exposure.
Where to go for lab-ready contamination procedures
Research-grade peptides with third-party certificates of analysis and prompt dispatch are available from suppliers who prioritize traceability and documentation standards aligned with this guide's recommendations. Batch information enabling verification of sterility claims and lot history logging should accompany every shipment upon arrival.
For teams building or refining their own procedures, the sterility testing checklist aligned to compendial standards walks through a 14-day release process, and the bacteriostatic water technical guide covers diluent handling in more depth than a single reconstitution section can. All Au Peptide Labs products are supplied strictly for laboratory research use and are not intended for human or veterinary administration.
Why I favour discarding over "waiting to see"
Uncertainty about sterility is not a coin flip you get to call in the peptide's favour. When a vial's history is unclear, the visible signs are ambiguous, and testing isn't immediately available, the conservative call is discard, not deferral. Labs that "wait and see" on a suspicious vial are usually rationalising a sunk cost, not making a risk assessment.
The bigger issue is cultural, not technical. Most contamination events I'd point to trace back to a lab that never built puncture logging or glove discipline into its actual workflow, rather than to some rare supply chain failure. Testing catches contamination after it happens. A logged puncture count and a stopper-swabbing habit that's actually enforced, not just written into a manual nobody reads, prevents it in the first place. Build the habit before you need the test.
— Dr. Authur
Source research a peptide vial contamination guide the traceable way
Research-grade peptides shipped from within Australia with a certificate of analysis on every batch help ensure traceability without needing to chase suppliers for documentation after delivery.
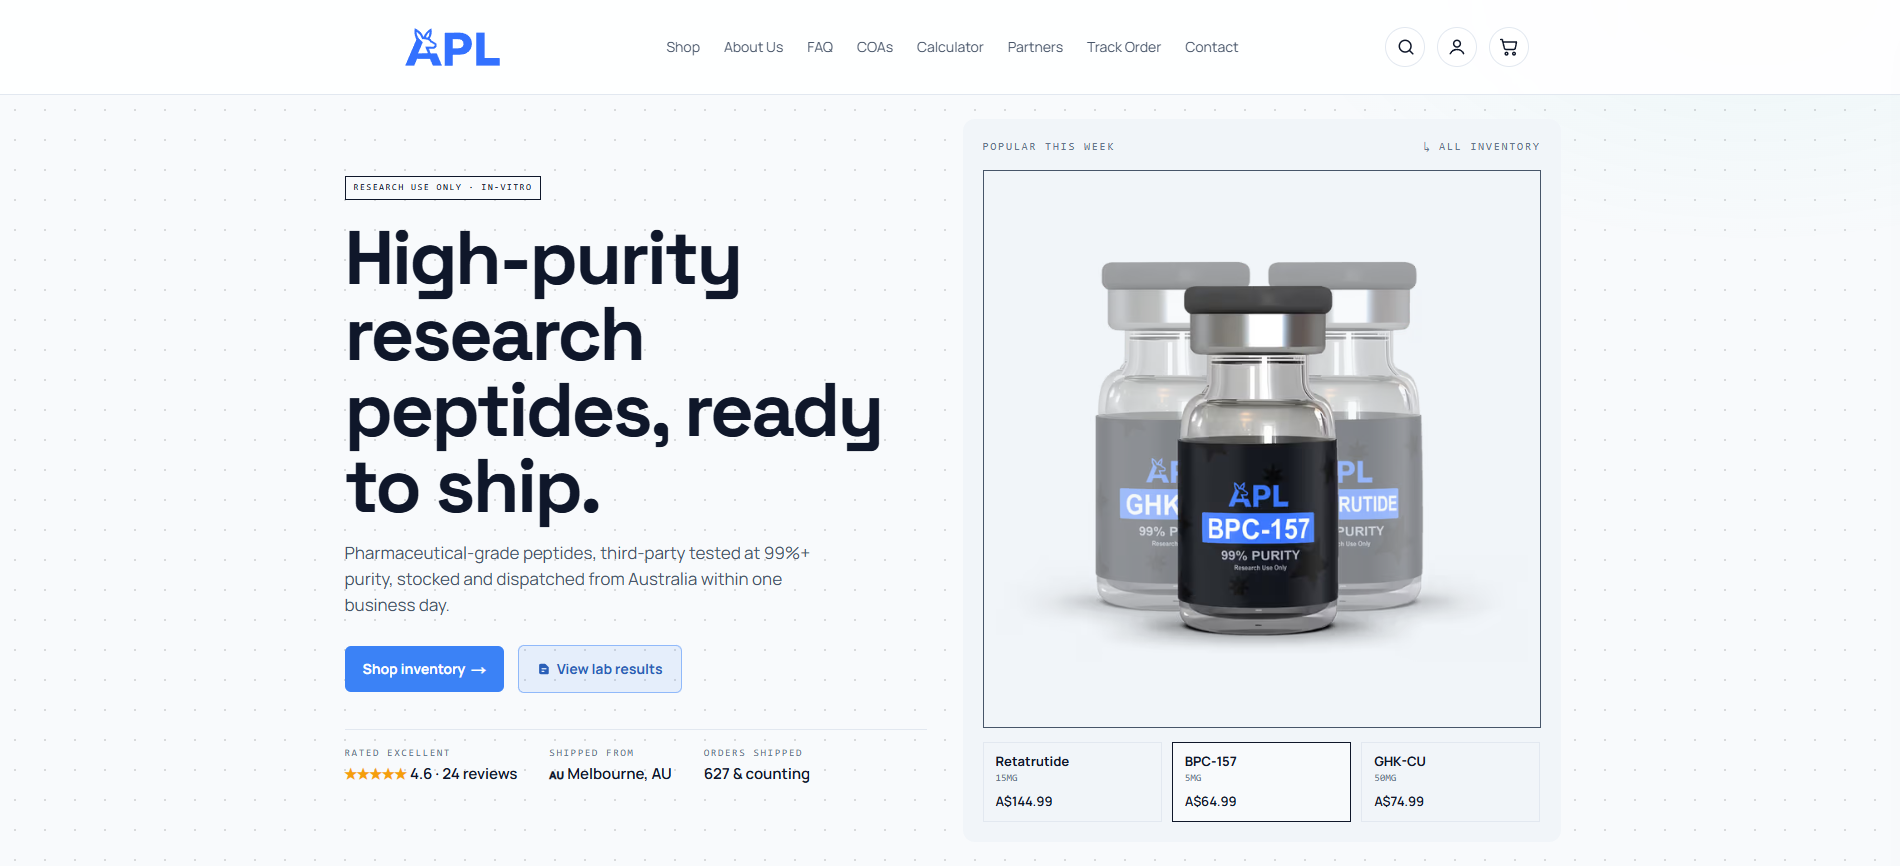
Compared to suppliers with inconsistent batch records, sourcing from suppliers with consistent documentation reduces uncertainty when issues arise. Rapid dispatch within Australia also reduces transit time and minimizes uncontrolled storage conditions, which can be critical for sterility-sensitive materials. Some suppliers offer consumables supporting recommended handling practices, including bacteriostatic water and insulin syringes, allowing labs to standardise reconstitution supplies from a consistent traceable source rather than mixing components from multiple vendors with varying documentation standards.
If your current supply chain has left you short on COAs, lot traceability, or a fast enough turnaround to avoid extended transit storage, browse Au Peptide Labs' research peptide range and check current stock and documentation before your next order.
This article is general information, not a substitute for advice from a qualified doctor. Consult a qualified healthcare professional about your own circumstances before acting on anything here.
Sources
- Peptide impurities in commercial synthetic peptides and their implications for vaccine trial assessment
- Contamination control strategy in sterile manufacturing: a digital, risk-based and future-oriented review
- Peptide storage guidance — NIBSC
- How to store peptides: shelf life, fridge vs. freezer & the 30-day myth (Peppal blog)
- Peptide storage and handling guidelines — GenScript
FAQ
How long can a peptide vial last in the fridge?
A reconstituted vial mixed with bacteriostatic water is typically usable for around 28 to 30 days refrigerated, a window set by the diluent's preservative limits rather than the peptide's own chemical lifetime. Lyophilised, unreconstituted peptide stores far longer, ideally frozen at minus 20 degrees Celsius.
How do you know when a peptide has gone bad?
Persistent cloudiness that doesn't clear on warming, visible particles, a surface film, or an unusual colour or odour after reconstitution are the main red flags, and any of these warrants discarding the vial or sending it for sterility testing rather than using it.
Is it bad if I dropped my peptide vial?
A drop that cracks the seal or stopper compromises sterility immediately and the vial should be quarantined and discarded, even if the glass itself looks intact; a drop with no visible damage to the seal is lower risk but still worth inspecting closely before continued use.
What happens if you shake your peptide vial?
Shaking introduces shear stress that can denature or aggregate the peptide, which shows up as cloudiness unrelated to contamination; always mix by gentle swirling instead, and use the warm-and-swirl check to see whether the cloudiness clears before assuming the worst.