
Yes, peptides can be sterile-filtered in most laboratory workflows, but the technique matters as much as the decision to filter at all. Filtration through a validated 0.2 µm membrane removes bacteria and fungi effectively; it does not reliably remove endotoxin, and it can strip a measurable fraction of your peptide onto the membrane surface if you skip pre-wetting or push the syringe too hard. The regulatory position, reflected in the EMA guideline on synthetic peptides, still treats terminal sterilisation as the preferred route wherever the peptide can tolerate it. Sterile filtration is the fallback for heat-labile molecules, not the default first choice.
Before you filter anything, lock in these basics:
- Pore size: 0.2 µm is standard for bacterial retention; 0.1 µm gives extra assurance for smaller mycoplasma-type organisms in specialised applications.
- Membrane chemistry: low-binding PES or PVDF for most aqueous peptide solutions; regenerated cellulose where solvent compatibility isn't a concern.
- Pre-wet the membrane with your buffer before pushing the peptide solution through, and discard the first small volume of filtrate.
- Pressure control: slow, steady plunger pressure. Avoid air ingress, which can trigger aggregation at the air/liquid interface.
Quick reminder: sterile filtration is a bioburden control step, not an endotoxin removal method. If your downstream use has an endotoxin limit, you need a separate depyrogenation strategy in addition to filtration.
When to choose sterile filtration vs terminal sterilisation
The EMA's guideline on synthetic peptide manufacture sets out a clear hierarchy, and it's worth internalising before you default to a syringe filter out of habit. Terminal sterilisation should be the method of choice wherever it's achievable, because autoclaving or other terminal methods deliver a sterility assurance level of 10⁻⁶ or better. Sterile filtration combined with aseptic processing is acceptable only as a fallback, and only when you can demonstrate that terminal sterilisation degrades the peptide unacceptably.
That's a meaningful bar. It's not enough to assume your peptide "probably won't survive autoclaving." You need data.
Formulation choices made early in development, including buffer pH, ionic strength, and osmolality, often determine whether terminal sterilisation stays on the table at all. Getting the formulation right can sometimes rescue a peptide that would otherwise fail heat treatment, according to the EMA's guidance on synthetic peptide development.
Several peptide characteristics push a preparation toward the filtration pathway rather than terminal heat treatment:
- Heat-labile secondary structure that denatures or aggregates above physiological temperature.
- A tendency to form higher-order aggregates or fibrils when heated, even transiently.
- Formulation buffers containing excipients that degrade under autoclave conditions.
- High peptide concentrations where heat-induced aggregation kinetics accelerate sharply.
If any of those apply, you can't just assert it. The justification process typically involves forced-degradation stability studies comparing heated versus non-heated samples, impurity profiling by HPLC or mass spectrometry to quantify any new degradation products, and a documented rationale tying the data back to why terminal sterilisation isn't viable for that specific formulation. This is the same logic behind why so many parenteral peptide products on the market are freeze-dried and reconstituted rather than terminally sterilised in solution: lyophilisation sidesteps the heat problem while filtration handles bioburden before fill.
For research-scale work, the practical takeaway is simpler: default to asking whether your peptide has published stability data at autoclave temperatures before reaching for a syringe filter as the automatic choice. If you haven't run that comparison, sterile filtration is the safer assumption. Most peptide chemists preparing solutions for parenteral-style research applications end up filtering, because relatively few peptides tolerate 121°C autoclave cycles without some degree of aggregation or hydrolysis.
Choosing a filter: pore size, membrane material and filter format
Filter selection comes down to four variables working together: pore size, membrane chemistry, filter format, and your sample's physical properties. Get any one wrong and you either compromise sterility assurance or lose peptide to adsorption.
Pore size is the least contentious choice. A 0.2 µm membrane is the accepted standard for bacterial removal in aqueous peptide solutions and satisfies the vast majority of laboratory sterile filtration needs. A 0.1 µm membrane offers additional assurance against smaller organisms like Mycoplasma species, but it comes with a real cost: slower flow rates, higher back-pressure, and a greater risk of clogging with viscous or concentrated peptide solutions. Reserve 0.1 µm for cases where mycoplasma contamination is a specific concern, such as cell culture-adjacent applications, rather than using it as a blanket "safer" default.
Membrane chemistry deserves more attention than most protocols give it. Container and membrane material interactions with peptides are well documented, and the choice genuinely changes how much peptide you recover:
- Polyethersulfone (PES) balances low protein binding with broad chemical compatibility, making it a sensible default for most aqueous peptide buffers.
- Polyvinylidene fluoride (PVDF) tolerates a wider range of organic solvents than PES, useful when your peptide solution contains DMSO or acetonitrile carryover from synthesis.
- Regenerated cellulose (RC) offers some of the lowest protein-binding characteristics available, but its solvent tolerance is narrower. RC works well for purely aqueous buffer systems and less well once solvents enter the mix.
Filter format and diameter should scale to your sample volume and viscosity, not just whatever's on the shelf. A 13mm syringe filter suits volumes under a few millilitres. Moving to 25mm or 33mm diameters reduces the pressure needed to push equivalent volumes through, which matters more than it sounds for viscous or high-concentration peptide preparations. For anything above a few tens of millilitres, a capsule filter with a larger surface area avoids the clogging and hand fatigue that comes with repeatedly changing syringe filters.
Pre-filters earn their place whenever your peptide solution isn't perfectly clear. Lyophilised peptide cakes sometimes leave micro-particulates on reconstitution, and running the solution through a coarser pre-filter (0.45 µm or a glass fibre depth filter) before the sterilising-grade membrane extends the working life of your final filter considerably.
Run through this checklist before you commit to a filter:
- Sample volume: determines filter format (syringe filter versus capsule filter) and membrane surface area needed.
- Viscosity: high-concentration or self-assembling peptides may need pre-filtration or shear treatment first (covered below).
- Solvent content: confirms whether PES, PVDF, or RC is chemically compatible with your buffer.
- Peptide concentration: higher concentrations increase adsorption losses proportionally, so low-binding membranes matter more as concentration rises.
- Binding risk tolerance: research applications needing precise dosing justify the extra cost of low-binding PVDF or RC over cheaper alternatives.
How do you sterile filter a peptide solution step by step?
A reliable protocol has four phases: preparation, priming, controlled filtration, and post-filtration handling. Skipping any of them is where most yield loss and contamination risk creeps in.
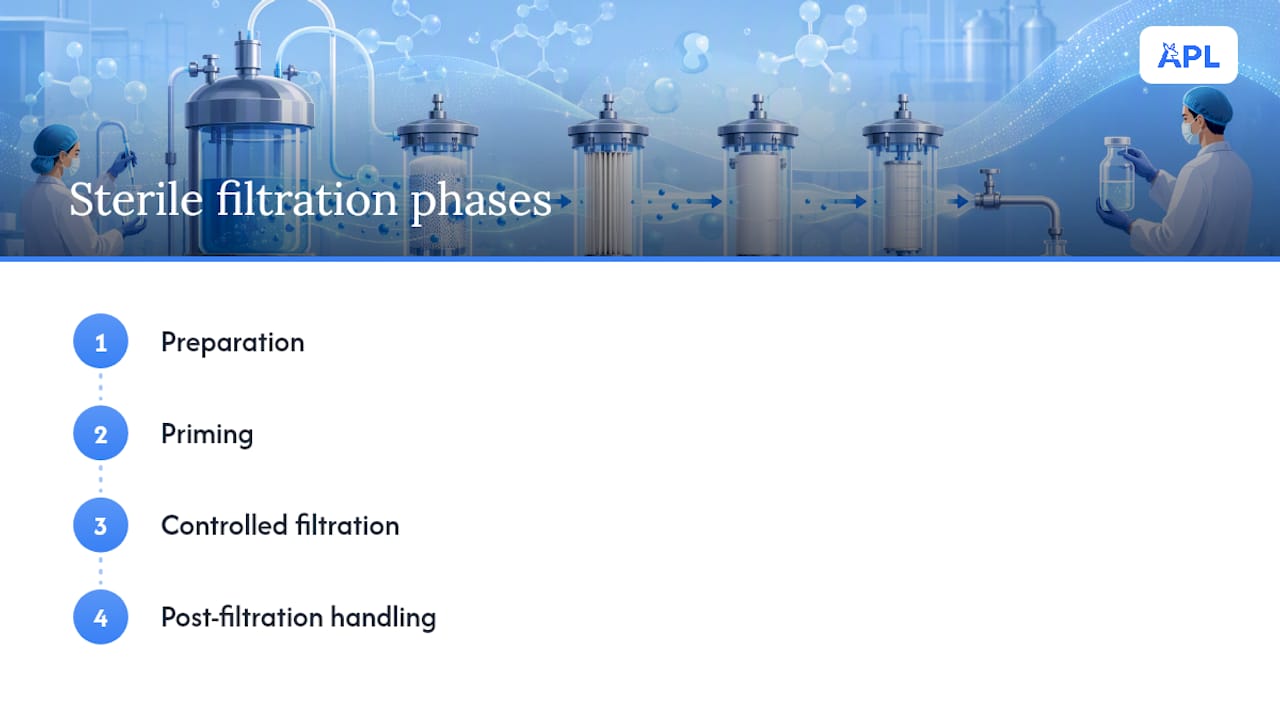
Phase 1: pre-filtration checks
Before the filter ever touches your peptide solution, confirm the basics.
- Verify solubility. Any visible particulates, haze, or incomplete dissolution will shorten your filter's working life and can give a false impression of contamination. If you're unsure whether your peptide is fully in solution, our peptide solubility guide walks through solvent selection and troubleshooting.
- Confirm target concentration. Filtering before you've finalised dilution wastes peptide on membrane adsorption twice over. Calculate your working concentration first using a tool like the peptide dilution calculator.
- Degas the solution if needed. Dissolved gas can come out of solution during filtration and form microbubbles that interfere with flow and, in some cases, contribute to interfacial aggregation.
- Stage sterile consumables. Sterile syringes, sterile collection vials, and a filter still in its sealed sterile packaging. Open the filter packaging only immediately before use.
Phase 2: pre-wetting the membrane
This step is the single most under-appreciated variable in peptide recovery. Membranes have a finite number of binding sites, and a dry membrane will adsorb peptide from the first several hundred microlitres that pass through it before those sites saturate. Pre-wetting the membrane with buffer, then discarding that initial wetting volume, saturates the binding capacity before your actual sample runs through.
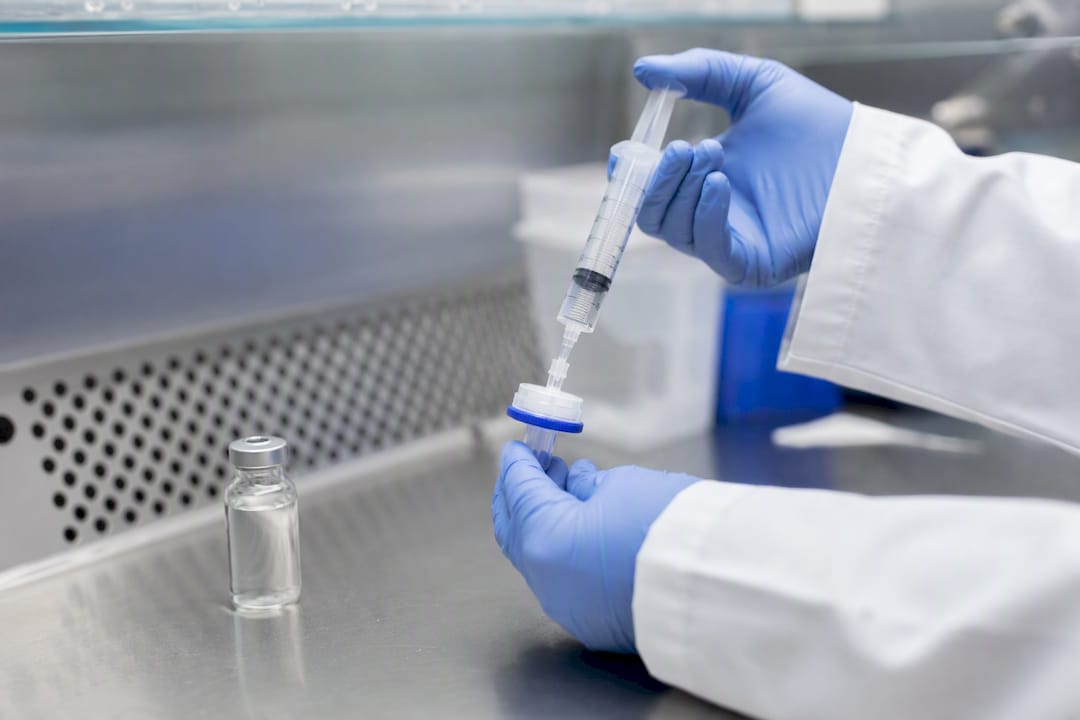
Draw a small volume of your filtration buffer (without peptide) through the filter first, and discard it. Only then load your peptide solution.
Pro Tip: Discard not just the pre-wetting buffer but the first few drops of your actual peptide filtrate too. Binding sites aren't fully saturated by buffer alone, and that first small volume of peptide solution often absorbs disproportionately before the membrane equilibrates.
Phase 3: controlled filtration technique
- Attach the filter to the syringe firmly but without overtightening, which can crack some plastic filter housings.
- Apply slow, steady plunger pressure. Resist the urge to push hard when flow slows. Instead, pause and let pressure equalise. Forcing flow through a partially clogged membrane risks membrane rupture and compromises sterility assurance.
- Hold the syringe with the filter pointing slightly downward to minimise air entrapment at the membrane face.
- If you feel resistance building sharply, stop. That's usually a sign the membrane is saturated with particulates and needs replacing, not more force.
- Collect filtrate directly into a pre-sterilised, low-binding container rather than an intermediate vessel, to minimise additional adsorption or contamination steps.
Phase 4: post-filtration handling
Aseptic technique doesn't end once the solution passes through the membrane. Transfer the filtrate to its final container inside a laminar flow hood or biosafety cabinet where available, cap immediately, and label with the peptide name, concentration, filtration date, filter lot number, and operator initials.
Store filtered peptide solutions according to their stability profile, typically refrigerated at 2 to 8°C for short-term use or frozen for longer storage, and protected from light if the sequence contains light-sensitive residues like tryptophan or methionine. For labs running sterility verification on filtered batches, a small-volume aliquot incubated in appropriate growth media over 7 to 14 days gives a practical, low-cost confidence check even without full pharmacopoeial sterility testing infrastructure.
Handling viscous and self‑assembling peptides: shear‑thinning and filtration strategies
Some peptides simply refuse to pass through a 0.2 µm membrane at useful concentrations, and it usually comes down to self-assembly. Peptides with amphipathic sequences, beta-sheet-forming motifs, or high net hydrophobicity can form nanofibrils, micelles, or hydrogel networks in solution. Those assemblies behave rheologically like a gel rather than a simple liquid, and gels clog sterilising-grade filters almost immediately.
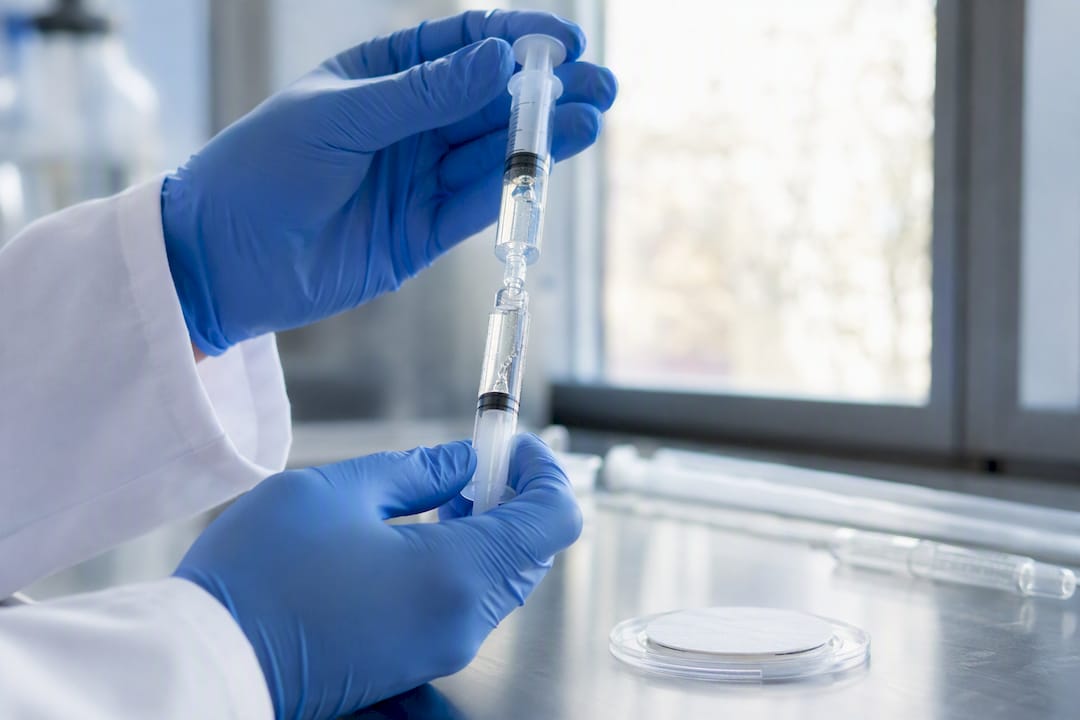
The physics here is shear-thinning: a solution's apparent viscosity drops temporarily when subjected to mechanical shear, then recovers once the shear stops. Patent literature on peptide sterilisation describes exploiting this directly. Syringe-to-syringe shear techniques, where the viscous peptide solution is repeatedly passed between two syringes connected by a narrow-bore connector, can temporarily reduce viscosity enough to permit filtration through a standard sterilising membrane.
The technique works because the shear event breaks down the transient network structure holding the gel together, creating a brief low-viscosity window before the peptide re-assembles. Timing is everything. Filter too soon and you haven't reduced viscosity enough. Wait too long after the last shear pass and the solution has already begun re-gelling, and you're back to a clogged membrane.
Practical steps for shear-assisted filtration:
- Connect two syringes with a female-female luer connector, ideally narrow-bore, to maximise shear during transfer.
- Pass the peptide solution back and forth between syringes 10 to 20 times, or until visible viscosity reduction is apparent.
- Filter immediately, within the shear-thinning window, using standard syringe filter technique.
- If the first filtration attempt stalls, repeat the shear cycle rather than forcing pressure through a partially set gel.
Expected pressure ranges: Filtration of self-assembling peptides using shear-assisted methods commonly falls in the 0.1 to 0.6 MPa range, well above what's needed for simple aqueous solutions. Pressures outside that range are a signal something's wrong, either the shear window has closed or the membrane pore size is mismatched to the sample.
When shear-thinning alone isn't enough, other options include pre-diluting the peptide below its gelation concentration before filtering (then concentrating post-filtration if the application allows it), inserting a coarse pre-filter to remove any partially formed aggregates before the sterilising membrane, or moving to pressurised filtration equipment designed for higher back-pressure tolerance than a hand-operated syringe. Flow characteristics and clogging behaviour vary substantially by peptide sequence and concentration, which is why a small pilot filtration run before committing your full batch volume is worth the extra ten minutes.
Document the shear cycle count, timing between shear and filtration, and pressure applied for every viscous peptide batch. That record becomes your reference the next time you handle the same sequence, and it's the difference between a repeatable protocol and starting from scratch every session.
Container choice, adsorption and post‑filtration storage
The filter isn't the only surface your peptide touches. What you filter into matters almost as much as what you filter through, because container walls adsorb peptide too, sometimes more than the membrane did.
Glass and plastic each carry distinct trade-offs. Type I borosilicate glass remains the general standard for injectable biologics because of its chemical neutrality and resistance to leaching under a wide range of pH and solvent conditions, and it withstands heat sterilisation methods that most plastics can't tolerate. That heat resistance is largely irrelevant once you've already sterile-filtered your peptide solution, since you won't be autoclaving the filled container afterward, but glass's chemical stability over long-term storage still gives it an edge for archival samples.
Polymer containers, particularly cyclic olefin polymer (COP) and cyclic olefin copolymer (COC), have closed much of that gap. These materials offer genuine advantages for pre-sterilised, single-use workflows and tend to show different adsorption and leachables profiles than commodity plastics like polypropylene. For a lab running frequent small-batch filtrations, pre-sterilised COP vials remove an entire sterilisation step from your workflow, at the cost of slightly different peptide-surface interactions than glass.
A few practical container notes worth flagging:
- Low-binding surfaces matter most for dilute peptide solutions, where a small absolute amount adsorbed represents a large percentage loss. Surface-treated or siliconised-free low-binding tubes reduce this measurably.
- Silicone oil used to lubricate some prefilled syringes and stoppers can interact with peptides at the interface, occasionally triggering aggregation. Check supplier specifications if you're using prefilled syringe formats.
- Tungsten residues, a byproduct of the pin-forming process in some prefilled syringe manufacturing, have been linked to protein aggregation in sensitive formulations. It's a niche concern for most research applications but worth knowing if you're troubleshooting unexplained aggregation.
- Storage temperature should match your peptide's documented stability profile. Most filtered peptide solutions do best refrigerated for short-term use, with the container tightly sealed to prevent evaporation-driven concentration changes.
Our guide on peptide packaging materials goes deeper into compatibility across common container types if you're setting up a storage protocol from scratch. Whichever container you settle on, label it immediately after filtration with peptide identity, concentration, filtration date, and storage conditions. That habit alone prevents most of the "which vial was this" problems that plague busy labs.
Filter integrity, validation and sterility assurance at lab scale
Confidence in a sterile filtration step comes from more than trusting the pore size printed on the packaging. Industrial-scale manufacturing uses formal integrity tests, and while most research labs won't have that equipment, understanding the principle helps you judge what pragmatic alternatives are worth adopting.
Integrity testing, in its formal form, includes bubble point testing and diffusive flow testing, both of which confirm a membrane has no compromising defects by measuring the pressure at which air passes through a wetted filter. Few bench labs run this routinely, but the underlying logic still applies practically: a filter that shows unusually rapid flow with no resistance may have a pinhole or manufacturing defect, and a filter that clogs almost immediately may be undersized for your sample's particulate load. Either observation is worth noting and, in the first case, worth discarding the batch and re-filtering through a fresh unit.
For sterility verification without full pharmacopoeial infrastructure, a simple approach works reasonably well for research purposes:
- Reserve a small aliquot (1 to 2 mL) of the filtered solution.
- Inoculate into an appropriate growth medium such as tryptic soy broth for general bacterial and fungal detection.
- Incubate at the medium's recommended temperature for 7 to 14 days.
- Check for turbidity or visible growth as an indicator of contamination.
Documentation matters more than most researchers give it credit for, particularly when troubleshooting inconsistent results later. Record the filter lot number, membrane material and pore size, operator name, filtration pressure and approximate time taken, recovered volume against expected volume, and any sterility test outcomes. That log turns a one-off filtration into a reproducible, auditable process.
Keep the endotoxin limitation front of mind throughout. Sterile filtration removes microorganisms but does not reliably remove bacterial endotoxin, since endotoxin molecules are far smaller than the membrane's pore size. If your research application has a defined endotoxin limit, filtration needs to be paired with validated depyrogenation steps or endotoxin-reduction resin treatment, not treated as a standalone solution.
Publisher perspective: how Au Peptide Labs supports efficient sterile workflows
Dispatch from within Australia within one business day also means researchers spend less time managing degradation risk during transit and more time on the actual filtration protocol.
A few practical suggestions follow from the workflow issues covered above. Where your protocol allows it, sourcing peptide in pre-sterilised, low-binding vial formats reduces one variable from an already multi-step process. Planning your target concentration before filtration, rather than adjusting afterward, avoids diluting a filtered solution and reintroducing contamination risk through a second manipulation step; the dilution calculator is built for exactly that planning stage.
One caveat worth restating plainly: Aupeptidelabs supplies research peptides strictly for laboratory research use, not for human or veterinary administration, and every method described here should be validated against your own institution's protocols and equipment before adoption.
Discreet supplier note and tools
Sourcing peptide with a reliable certificate of analysis is half the battle before you even reach the filtration bench, and that's where Aupeptidelabs earns its place in a research workflow.
All products are supplied strictly for laboratory research use, not for human or veterinary application. If you're planning a filtration run and need to nail down target concentrations first, the peptide dilution calculator works through the maths before you touch a syringe filter, and for concentration cross-checks, the Usapeptide offers a useful second reference point. Browse the full catalogue, including commonly requested research peptides like LL-37 and ARA 290, on the main Aupeptidelabs store, where every listing carries its own COA ready for download before you place an order.
Frequently asked questions about sterile filtration for peptides
What pore size should I use to sterile-filter a peptide solution? A 0.2 µm membrane is standard for bacterial removal in most aqueous peptide preparations. Move to 0.1 µm only for applications with specific mycoplasma concerns, since finer pores slow flow and increase clogging risk.
Does sterile filtration remove endotoxin from peptide solutions? No. Filtration removes microorganisms but does not reliably remove endotoxin, because endotoxin molecules pass through pores small enough to retain bacteria. Applications with endotoxin limits need a separate depyrogenation step.
Why do some peptide solutions clog filters immediately? Self-assembling or high-concentration peptides often form gel-like networks that behave as viscous fluids rather than simple solutions. Syringe-to-syringe shear techniques can temporarily reduce viscosity enough to allow filtration within a limited time window.
Should I use glass or plastic vials for filtered peptide solutions? Glass remains the general default for chemical stability and long-term storage, while COP or COC polymer vials suit pre-sterilised, single-use workflows with somewhat different adsorption characteristics. Choose based on storage duration and how your workflow handles sterilisation.
How much peptide do I lose to filter adsorption? Loss varies by membrane chemistry, peptide concentration, and whether the membrane was pre-wetted. Pre-wetting and discarding the first filtrate volume measurably reduces adsorption losses, though some loss is expected on nearly every membrane type.
Can I sterile-filter a peptide instead of terminal sterilisation? Sterile filtration is an accepted fallback when terminal sterilisation would degrade the peptide, provided that's justified with stability and impurity data. Terminal sterilisation remains the preferred method wherever the formulation can tolerate it.
Sources
- Guideline on the development and manufacture of synthetic peptides (EMA/CHMP/CVMP/QWP/367182/2025)
- US11090398B2 - Sterilization and filtration of peptide compositions
- Peer-reviewed article on container interactions and adsorption (PMC review)
- Glass or plastic? Container material choices | BioPharm International